Booking Meetings via Groove Scheduler - Microsoft 365 Users
Your Groove Scheduler is meant to help you set up meetings with your prospects and clients without the hassle of multiple emails and changing schedules. While you focus on building meaningful relationships, your Scheduler can help with the logistics of setting up meetings.
To get started, we'd recommend customizing your Scheduler to your preferences.
Booking Meetings - Scheduler Link
Your Groove Scheduler link will display free time slots on your calendar to whoever you're emailing (based on the working hours you've set up) so they can easily pick a time that works for them.
-
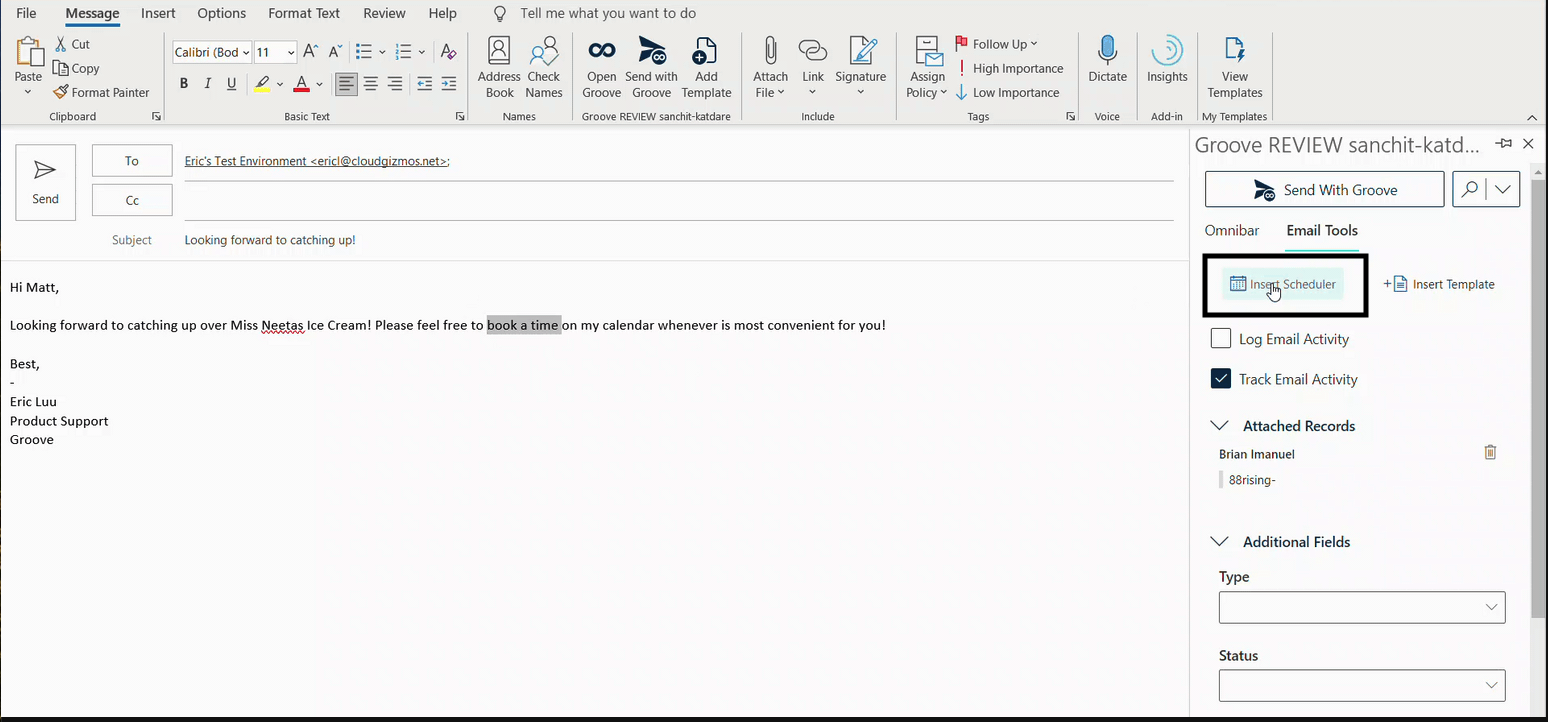
Open a New Email and Open Groove
-
Click on the calendar icon
-
-
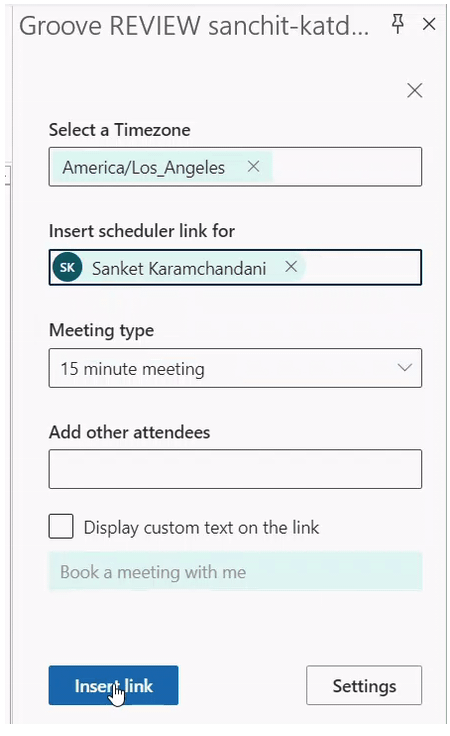
Add other attendees (if you'd like to include colleagues in your meeting)
-

Book Meetings - Add Specific Times
**Please contact your CSM to have this feature enabled.
If you'd like to offer your prospects and clients specific time blocks to choose from, vs. sending them your link, which has your entire availability, you can use Add Specific Times:
-
Open a new email and Open Groove
-
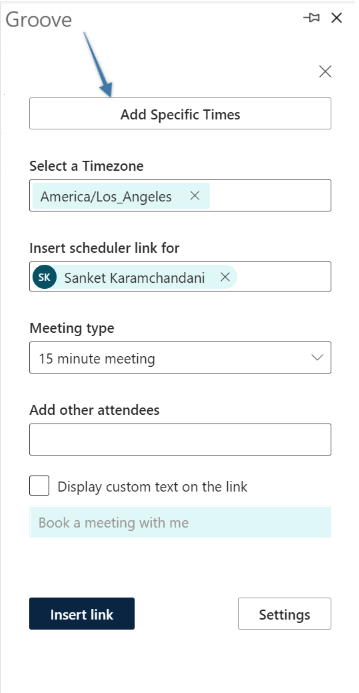
Click Insert Scheduler > Add Specific Times
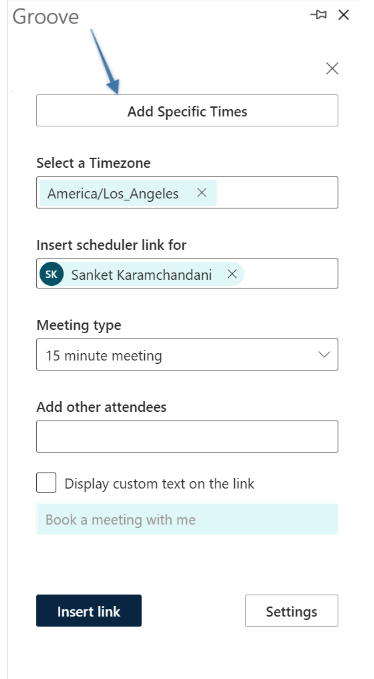
3. Start with a blank invitation or apply one of your saved meeting types
-
Pro Tip: Start with a meeting type, but edit the invitation to personalize it for your client
4. Add other attendees if you’d like to include your colleagues in the meeting
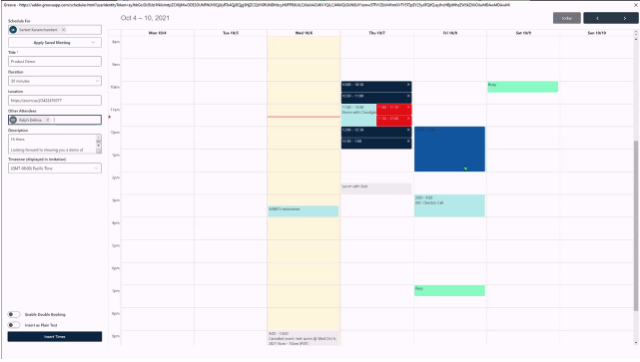
5. Select times you’d like to send by dragging your mouse over desired slots on your calendar
-
Pro Tip: If you’d like to offer times that are already blocked off on the calendar, you can Enable Double Booking
-
Pro Tip: If you know that your client is in a different time zone, you can adjust the time zone that the times are displayed in
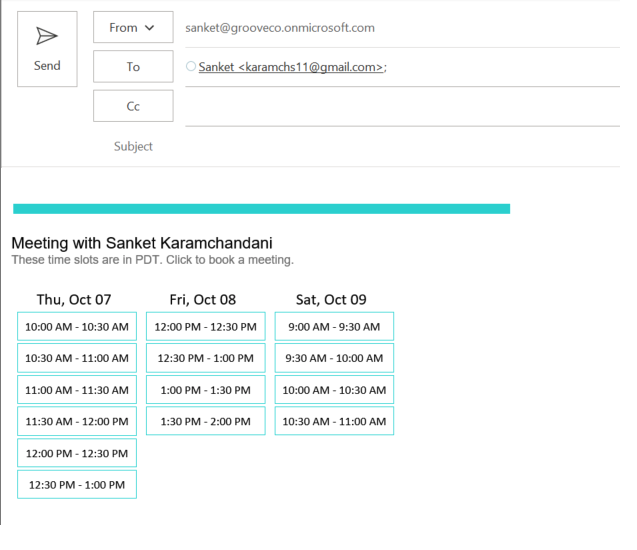
6. Click “Insert Times” and send your email!
Once you insert times and send the email, your customers can select a time that works best for them. From there, Groove will automatically:
-
Set up the meeting on your Outlook Calendar for everyone involved
-
Send your customer a confirmation of the meeting details
-
Send you a notification that a meeting was booked
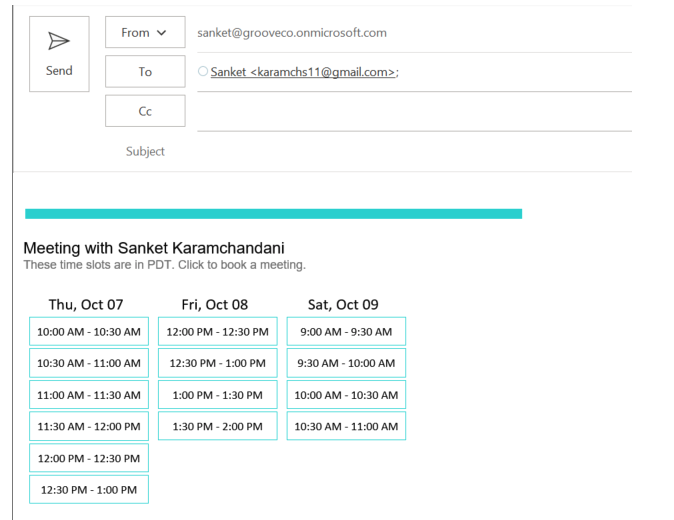
Insert Link

Note: Groove displays your free time slots to customers in their time zones.

Insert Scheduler Link in Templates
You can insert your Scheduler link into an email draft, then copy and paste it wherever you’d like someone to be able to book a meeting with you quickly. For example, you may want your Scheduler link in your Gmail signature or specific Groove templates. Additionally, you can copy/paste your scheduler link into templates you're using in your Groove Flows.


Schedule Meetings on Behalf of a Teammate
As each Groove user has their specific scheduler, it is possible to insert send the scheduler link or insert free times for a teammate into an email.
This is useful when you might want to connect your customer with a teammate and ask the customer to book a meeting with them.
When you insert a meeting link or add specific times using Groove's Scheduler, you can pick the name of any teammate in the list to Schedule.
This list contains the names of all Groove users in your company. After selecting a name, you can pick from any of the meeting types your teammate has set up.
Book Meetings - Add Specific Times
**Please contact your CSM to have this feature enabled.
If you'd like to offer your prospects and clients specific time blocks to choose from, vs. sending them your link, which has your entire availability, you can use Add Specific Times:
-
Open a new email and Open Groove
-
Click Insert Scheduler > Add Specific Times
3. Start with a blank invitation or apply one of your saved meeting types
-
Pro Tip: Start with a meeting type, but edit the invitation to personalize it for your client
4. Add other attendees if you’d like to include your colleagues in the meeting
5. Select times you’d like to send by dragging your mouse over desired slots on your calendar
-
Pro Tip: If you’d like to offer times that are already blocked off on the calendar, you can Enable Double Booking
-
Pro Tip: If you know that your client is in a different time zone, you can adjust the time zone that the times are displayed in
6. Click “Insert Times” and send your email!

Once you insert times and send the email, your customers can select a time that works best for them. From there, Groove will automatically:
-
Set up the meeting on your Outlook Calendar for everyone involved
-
Send your customer a confirmation of the meeting details
-
Send you a notification that a meeting was booked