Set Up and Customize Your Groove Scheduler
This article is for both Outlook and Gmail users.
Set up your Groove Scheduler according to your preferences so you can book meetings for yourself and your teammates! This article explains how you can customize your availability and meeting types, which automatically populate the details of an event that someone books on your calendar.
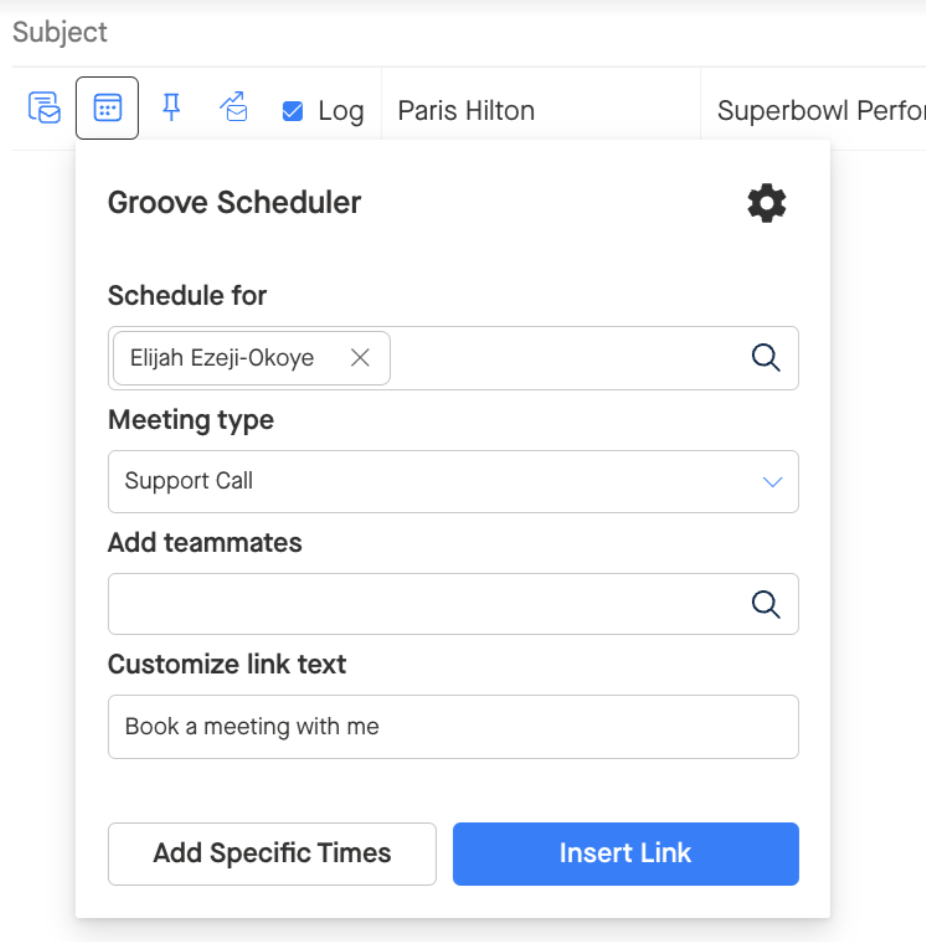
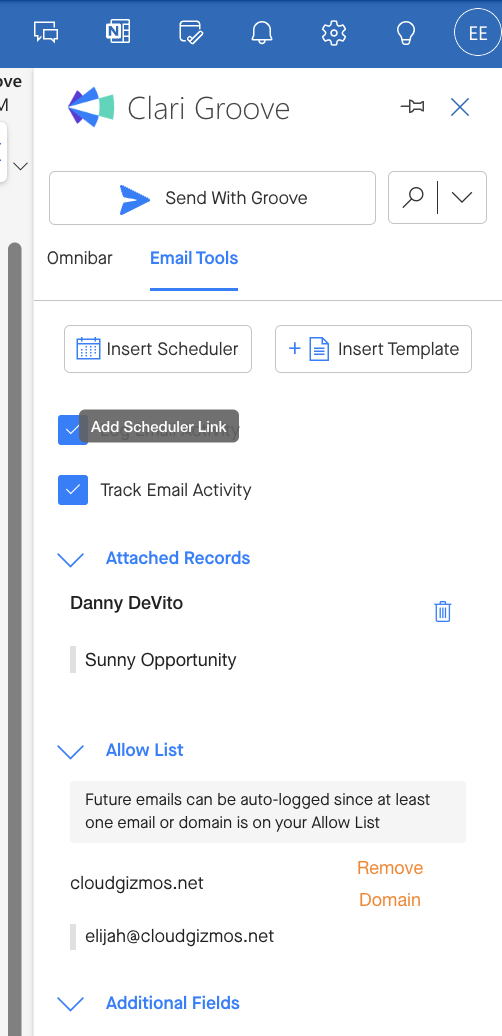
To start customizing your Groove Scheduler, go to Scheduler Settings from your inbox:
Gmail
Click the Scheduler icon:
Outlook
Click the Insert Scheduler button in Groove Sidebar on right side:
Calendar Availability
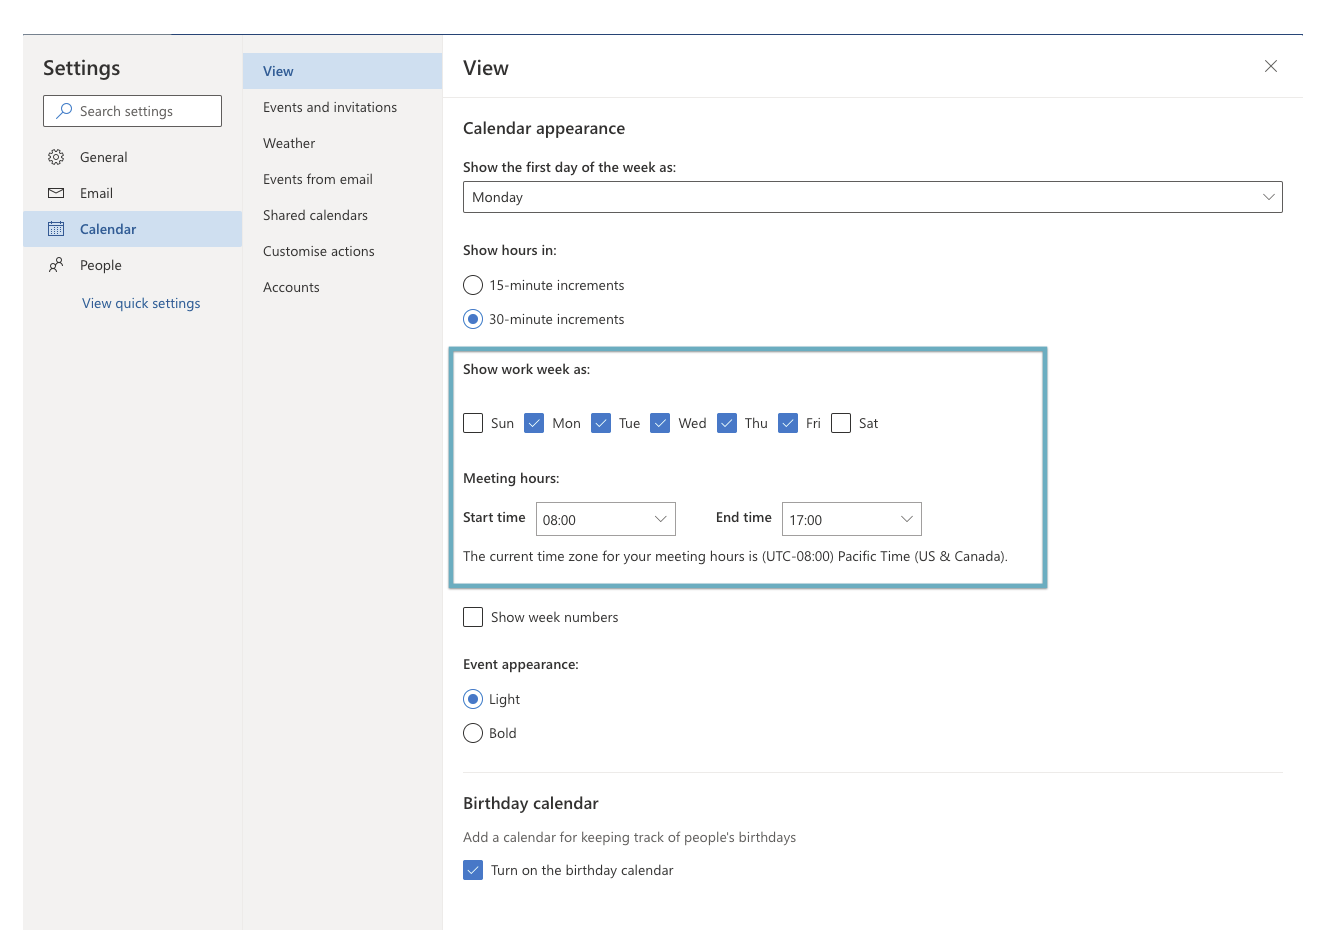
Note: Calendar Availability in Groove Settings only applies to G-Suite Users. For Microsoft 365 users, Groove mirrors your Outlook calendar settings for Work Schedule. To update or customize your Work Schedule in Microsoft Outlook, follow these steps:
-
-
Open Settings at the top right
-
Select View All Outlook Settings at the bottom
-
Navigate to the Calendar section, and update your working hours as shown below
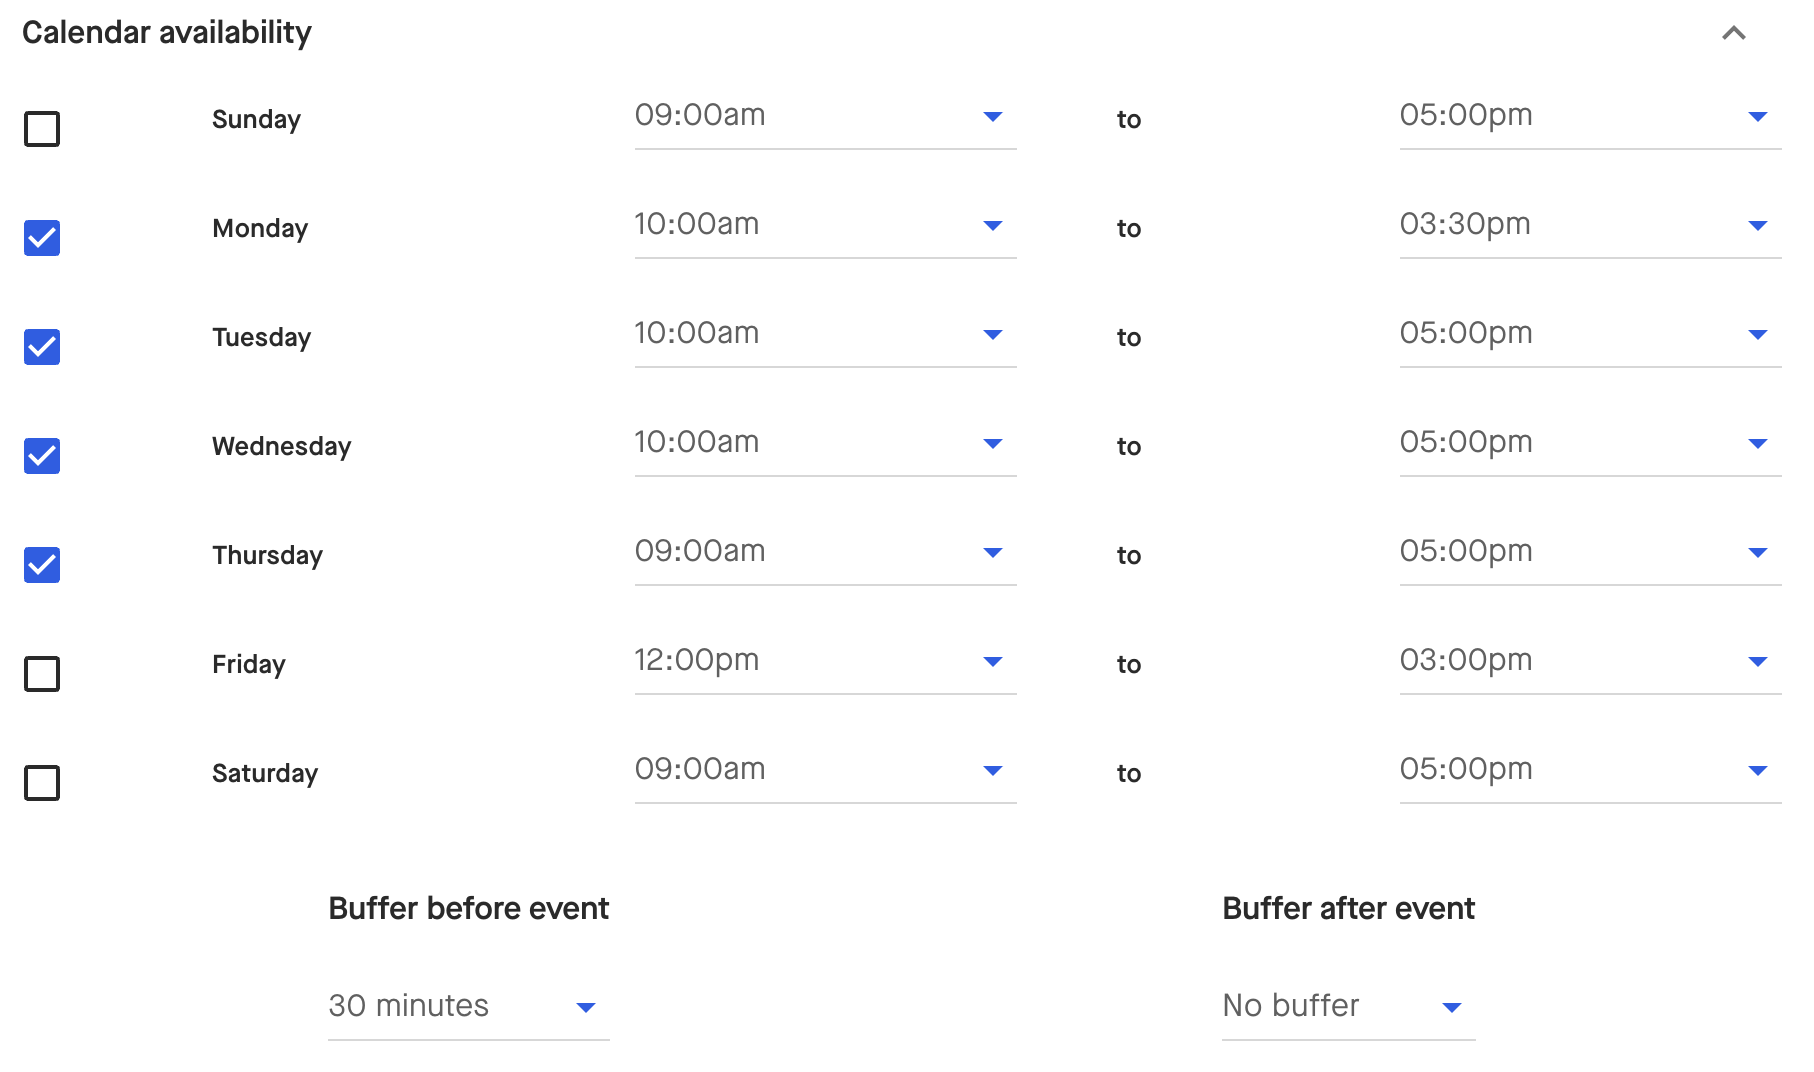
Gmail users can set working hours, when you'd like your Groove Scheduler link to show that you are available for meetings. You can also include buffer times before and after events if to prevent back-to-back meetings:
Creating Meeting Types
Groove's Meeting Scheduler allows you to pre-configure "meeting types" which determine the title, duration, location, description, and other aspects of a meeting. You may usually set up a 30 min "Intro Call" as well as a 60 min "Product Demo"; both of these are perfect candidates for meeting types.
-
-
Under Scheduler, click Meeting Types. Click the pencil icon to the right of an existing meeting type, or Add a New Meeting Type (see below). Click "Add a New Meeting Type" to create a new type or custom meeting.
-
Fill out all the fields, and Save.
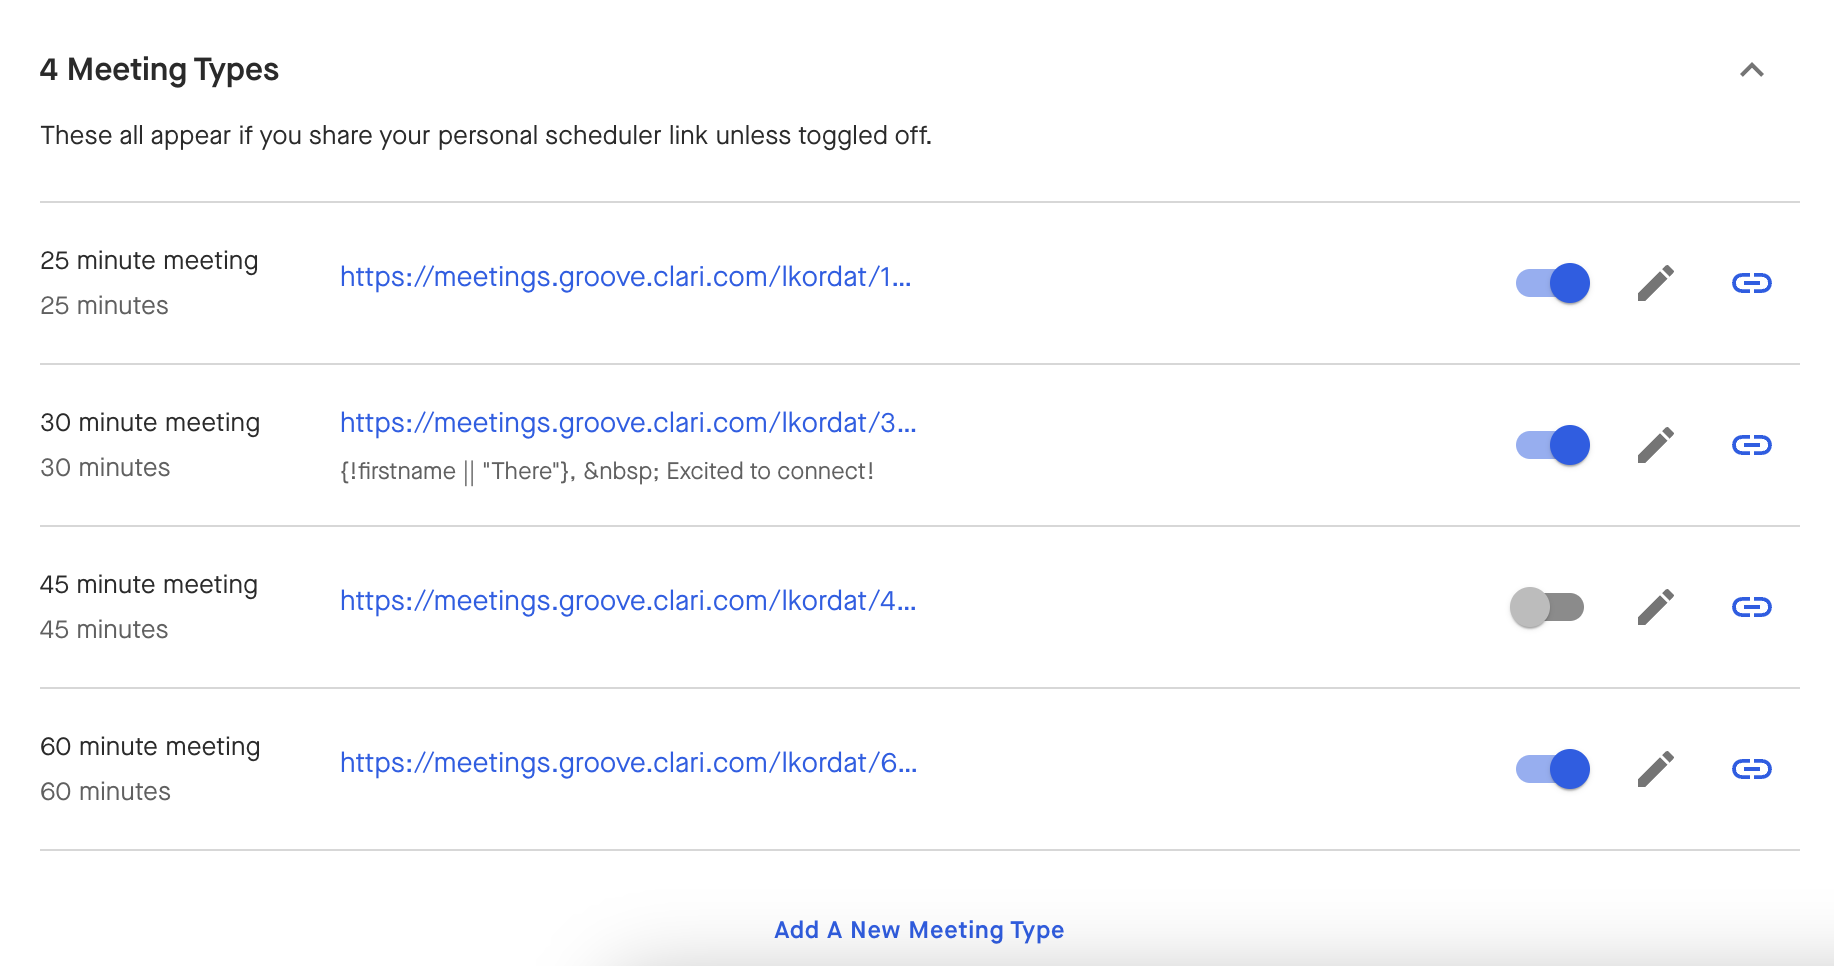
Note: you can update the properties of a meeting type at any time. Updates will only apply to meetings booked after you make changes.
Below is a list of each piece that you can customize in your meeting types:
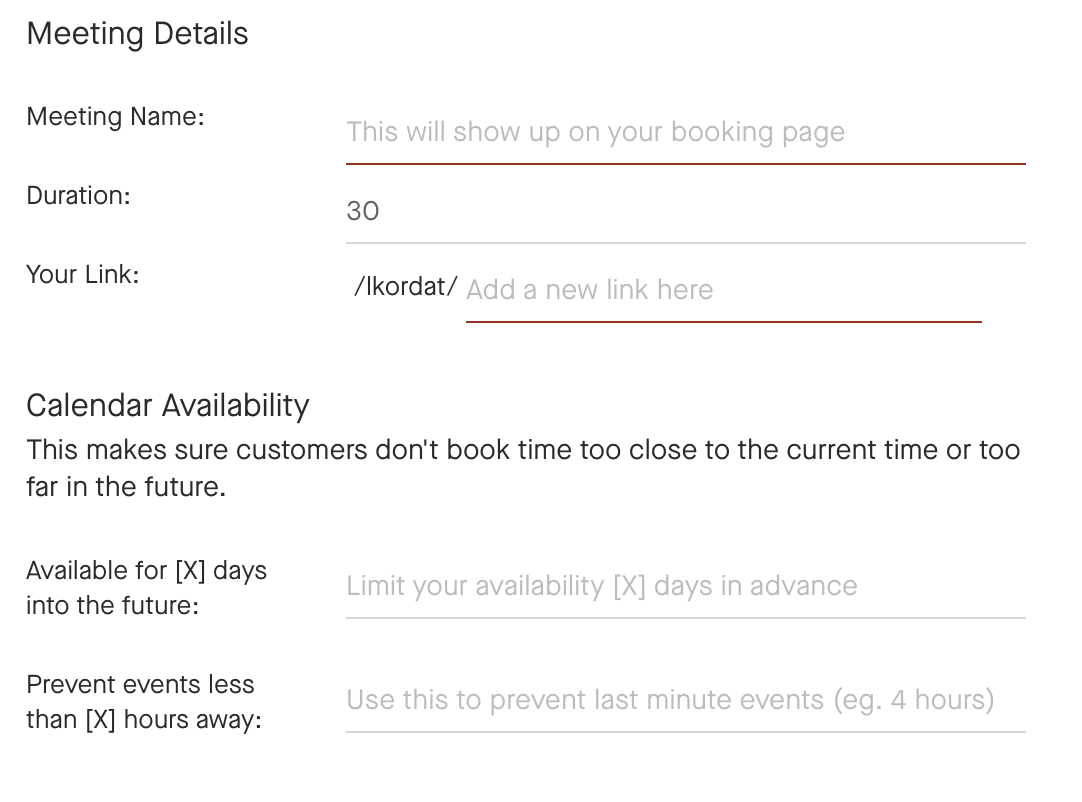
- Meeting Name: The unique name for your meeting type that will show up in the dropdown menu while inserting a Scheduler Link, or while inserting specific times.
- Duration: The length (in minutes) of the Google Calendar event that gets created when someone books a time with you.
- Your Link: The unique URL for this specific meeting type.
- Available for [x] days in the future: Decide how far ahead you’d like to be “available”. For example, if you want someone to book you only sometime in the next 2 weeks, you can include 14 in this field.
- Prevent events less than [x] hours away: Prevent last minute meetings by inputting a certain number of hours before someone can book a meeting with you. For example, if you have 3 in this field and someone clicks on your Scheduler Link, the next 3 hours will be blocked off regardless of what’s on your calendar.
For each of your Meeting Types, you can also configure the form that shows up for your customers when they are booking meetings via your Groove Scheduler:
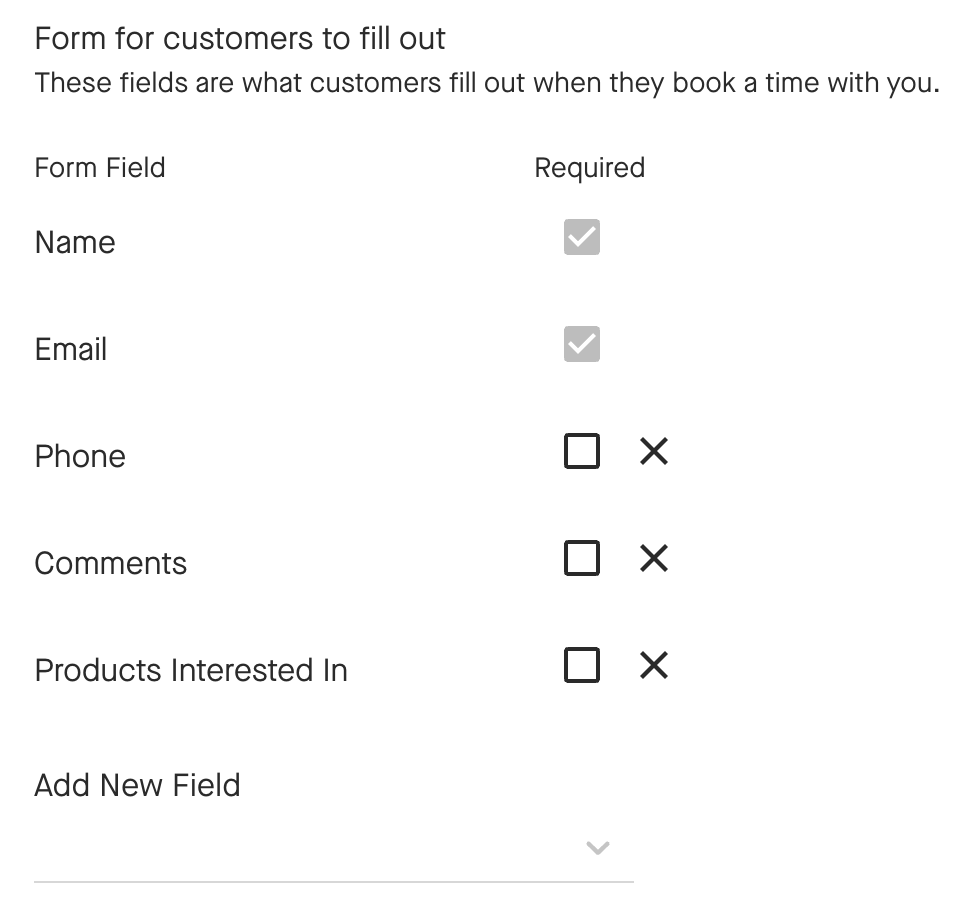
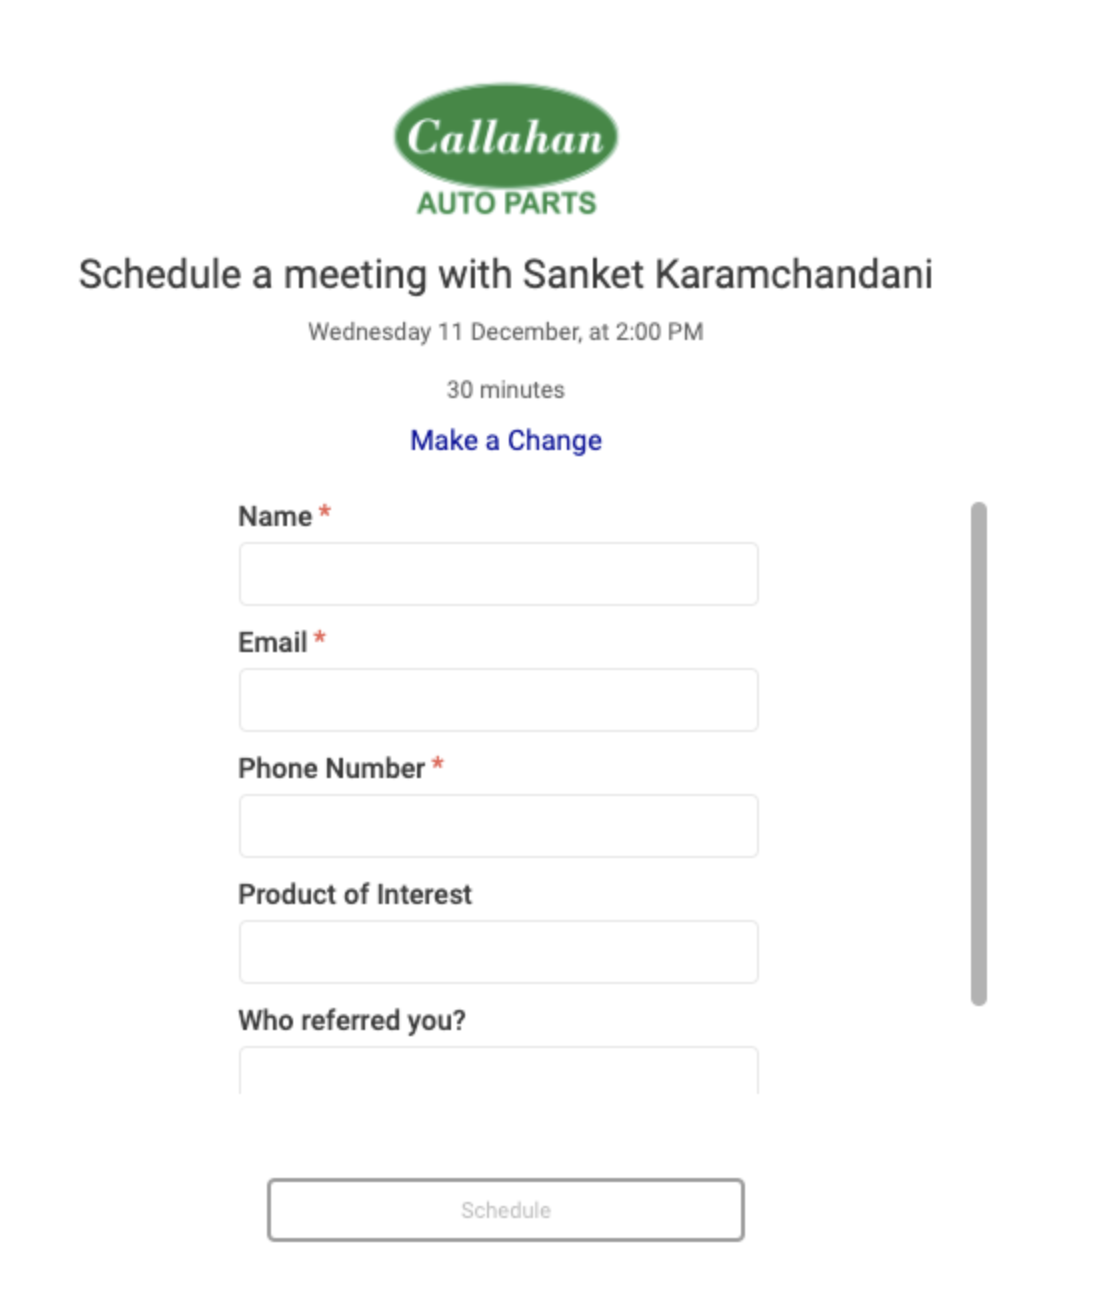
These fields are configured by your admin. By default, in each meeting type you'll see the fields that they have selected as the default fields. You can also add new fields which your admins have selected to be the option fields for you to choose from. Additionally, you can make any of these fields required for your prospect/customer to fill out.
This way, you can decide which pieces of information you'd like to collect when booking meetings:
Your Canonical Meeting Scheduler Link
This is useful if you want to use make the meeting scheduler link more predictable from a Salesforce template. Your Salesforce admin could create a new custom formula field on the user object groove_meeting_link__c. The formula is:
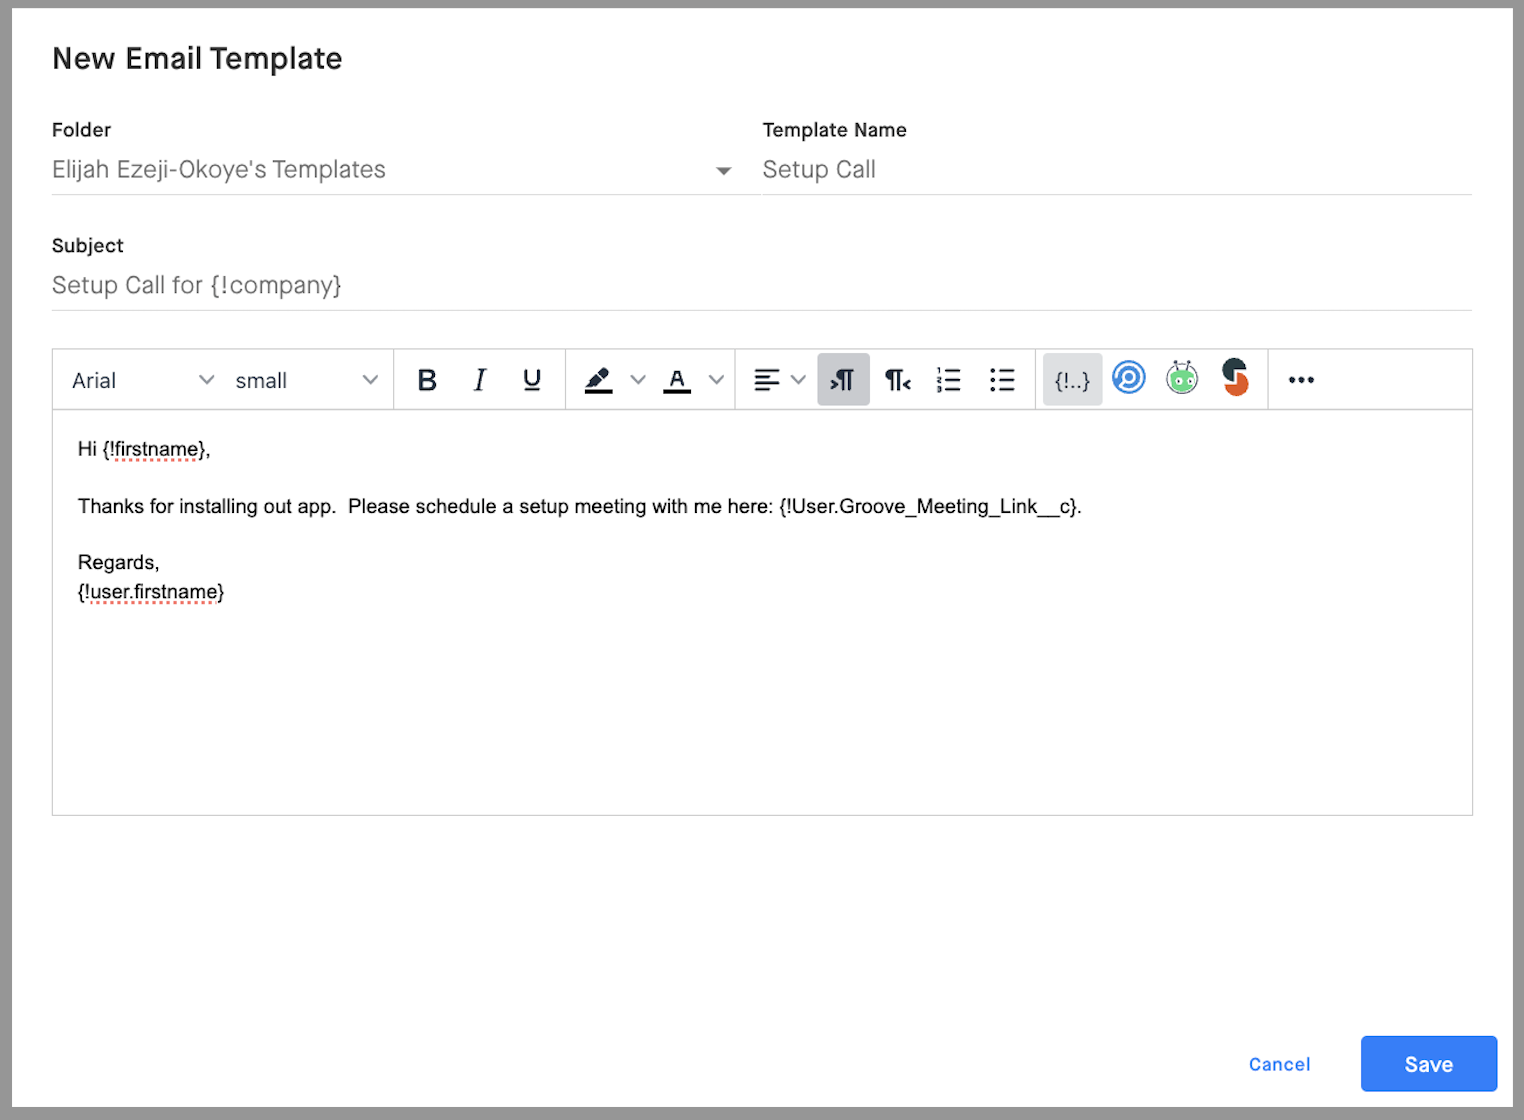
You could now reference this custom field in a merge field in a shared template {!User.groove_meeting_link__c}. That way the right meeting scheduler of the user who is using the template would automatically be inserted.
Note: If you were using the previous format to generate scheduler links with the old Groove subdomain (https://app.grooveapp.com/meetings/*ID), users will still be routed to the new scheduler link from this format, but we recommend updating your formula to "https://meetings.groove.clari.com/" & Id.


