Clari recommends that your Admin install the Clari Groove for Microsoft 365 Outlook add-in via the Microsoft 365 admin center, rather than manually installing the app on your own computers. Using the Admin Install method ensures Microsoft delivers Groove's full suite of features, providing a consistent experience for all of your org's users.
The Clari Groove for Microsoft 365 Outlook add-in should be thoughtfully installed for users who specifically use the add-in within their email inbox and have an active Groove Core license. To do this more easily, an Admin can deploy the add-in to user groups, rather than adding specific users.
An admin can follow these steps to deploy the Clari Groove add-in to your users either for the first time or to replace individual installs:
In the top nav, click Apps > Groove (it should be available so long as you completed the "add apps" steps above).
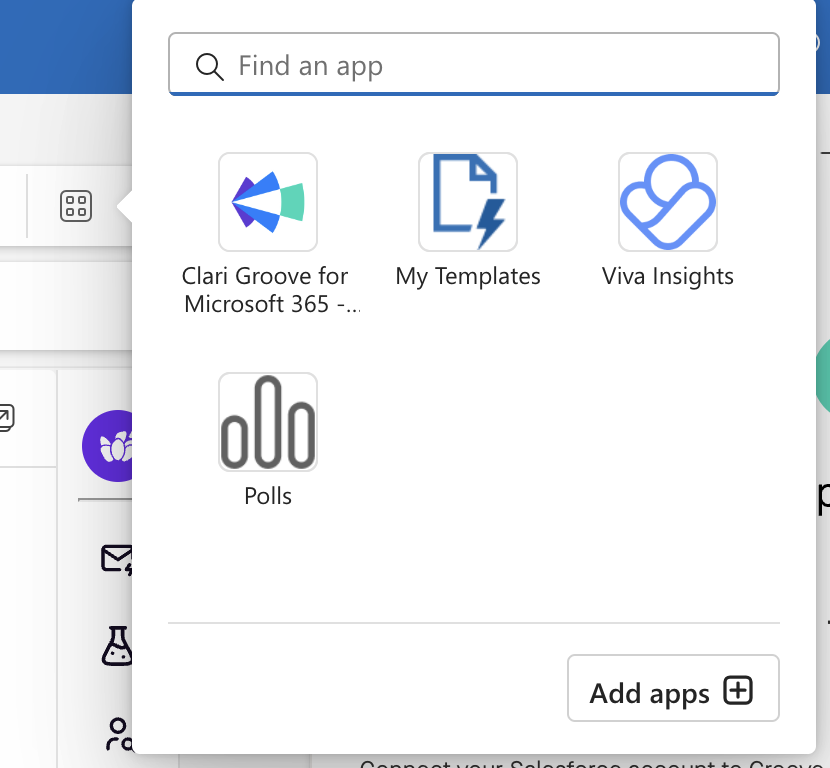
In the Desktop App:
Click the Groove icon in the top nav.
2. After the above steps for either web or desktop app, you should see Groove open on the right side of your screen. Click Get Started, and sign in with your work email address.
3. Then, you'll get a prompt to Sign into Salesforce to connect your Salesforce account to Groove.
4. Recommended: Enable Email Open tracking, and Link Click tracking:
-
With Email Open tracking, you'll get notified every time someone opens one of your emails
-
With Link Click, tracking, you'll get notified every time someone clicks on a link in your emails
5. Recommended: Auto-log all emails. With this enabled, Groove will automatically log all inbound and outbound emails to Salesforce, and relate them appropriately to the correct lead, contact, account, and/or opportunity. This also includes any emails you are sending from other devices such as your mobile phone!
6. Recommended: Auto-log all calendar events (in Beta). With this enabled, Groove will automatically log all your meetings related to Salesforce contacts/leads for you, and relate them appropriately to the correct lead, contact, account, and/or opportunity.
7. Always remember to Send with Groove
Your Groove add-in is now set up and connected properly to Salesforce; read the next article in the Getting Started (below) series to get the most out of your Groove. Don't forget - if you're on Windows, you can open and use the add-in on both Outlook web, and the Outlook desktop application. If you prefer to use that, feel free to jump there now while you check out the rest of the user guides.
Signatures in Groove
It's possible that your organization may have Outlook signatures set up at the server level, meaning that your signature will be appended to any email sent from any platform (Outlook on your computer, your phone, and even Groove).
In contrast to the server level, signatures may be set up at the client level, which means you will have to configure your signature in each method of email sending before they populate for that respective method. You will have to add your signature in your Groove settings for them to populate in Flow emails.
To add a signature in Groove:
- Go to Flow Settings
- Click to add your signature
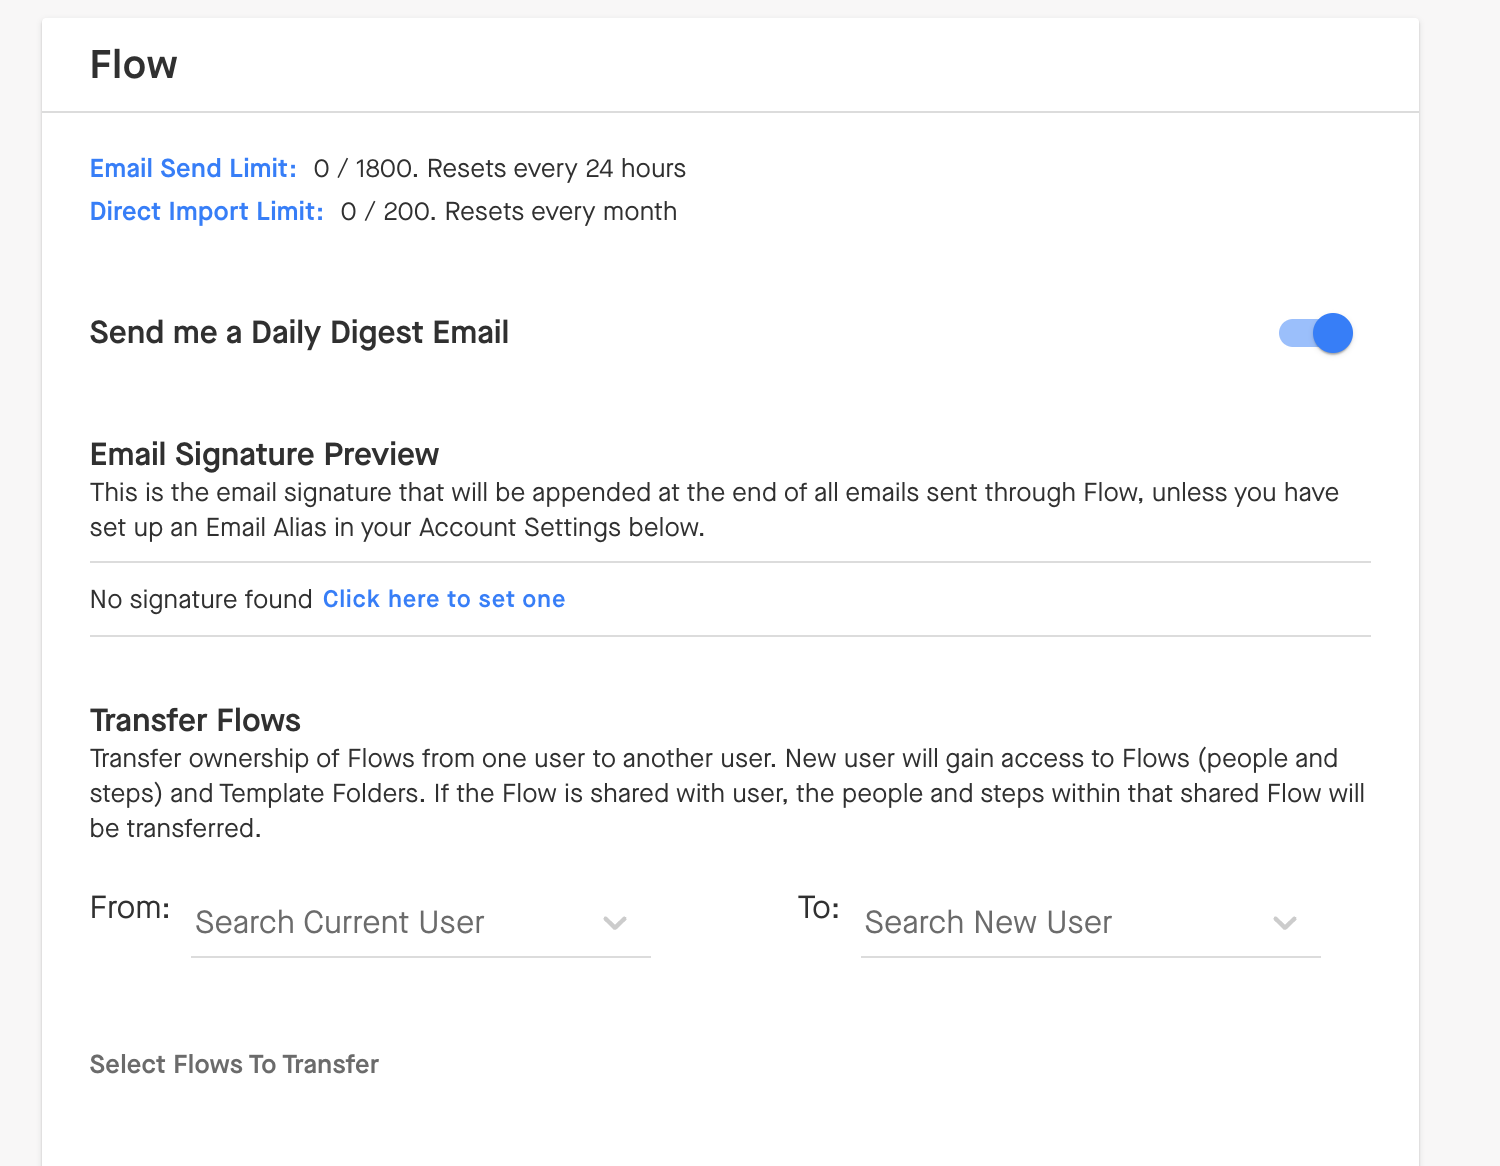
Note: Adding your signature in the Groove signature settings will apply to Flow emails only. If you aren't sure if your company's signatures are set up at the server level, reach out to your company's apps admin or IT team.
