Getting Started with Groove
This article covers the basics of Groove for any user! You'll download Groove and get started with Omnibar and Templates.
Step 1: Download Groove
For G-Suite Users
Download the extension here.
For Outlook Users
- Sign into your Outlook account
- Click Get Add-ins
- Search for Groove and click 'Add'
Need more details for installing Outlook? Read this.
Step 2: Learn Omnibar
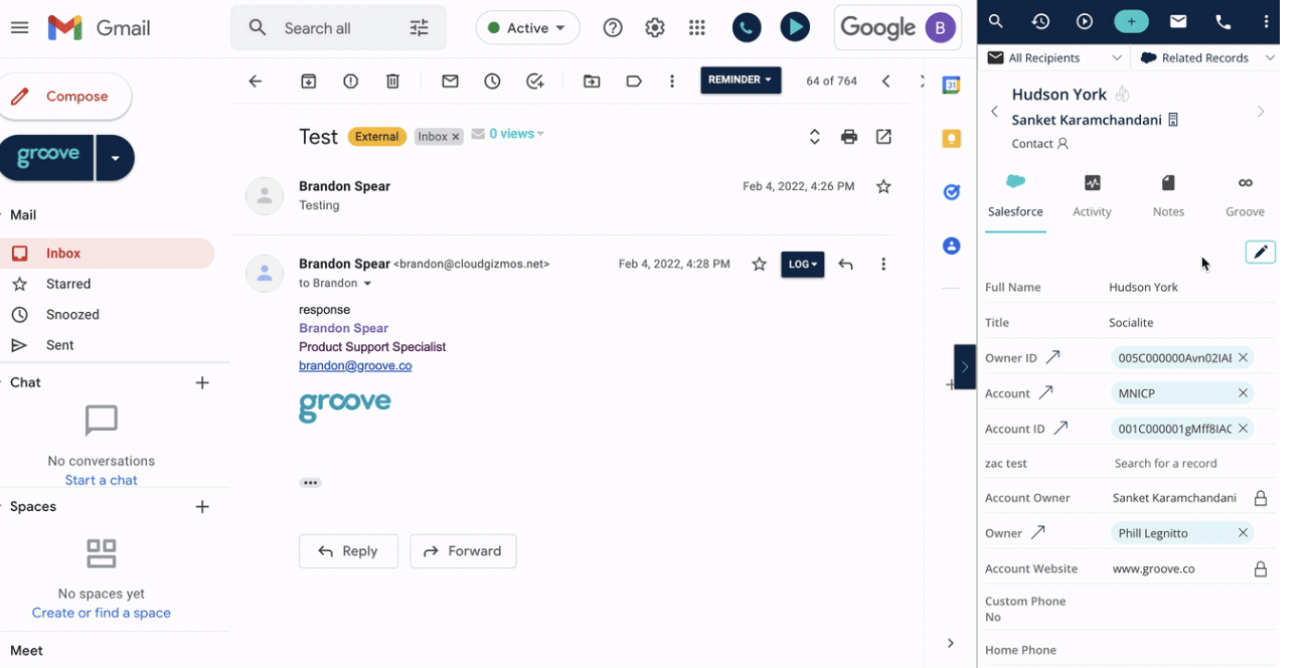
Groove’s Omnibar is your window into Salesforce. With the Omnibar, you can view, update, take notes on, and even create Salesforce records directly from your inbox.
Edit and Create Salesforce Records
When you hover over an email address or open a message from your inbox, Groove’s Omnibar automatically populates with the selected prospect’s Salesforce information.
To create a new record, select the blue “+” icon at the top of the Omnibar and the corresponding object you would like to add. You can then fill in any missing field values and hit “Save” to add this record to Salesforce:
If you’d like to search for a record directly, you can select the magnifying glass from the navigation bar in the top left of the Groove Omnibar.
Once the record appears, you can then make any changes to the record by clicking directly next to the field name to insert or update a value:

Omnibar Tips and Tricks
- The fields shown in this view are all customizable and should show what’s relevant to your team, so if you’re not seeing something you’d like to, reach out to your admins!
- For Dependent Picklists, you will see that once you update a "parent" picklist, all the dependent picklists are highlighted so that you know which additional fields to update.
- If you run into an error or validation rule, Omnibar pushes you into "Edit Mode" which allows you to update multiple fields at once before saving. You can also enter Edit Mode by clicking the pencil icon at the top right.
Read this article for more details on Omnibar.
Step 3: Check Out Templates
Creating a great template is fundamental to getting your prospect's attention. Let's learn how to create your first template in Groove. To get started, go to your Templates in the Groove web app (you can also create and use your templates directly from your inbox).
Here you'll see all templates you've created and templates that have been shared with you. Click on the + icon in the upper-righthand corner to create a new template or template folder.
Read more on creating templates here!
