Zoom Recorder Consent in Copilot
Copilot's recording feature follows Zoom's compliance rules for apps that record meetings on Zoom. Here's how this works in Copilot:
1. Recording announcements: The default Zoom announcement is triggered by Copilot. Users will also see a recording sign (red flashing dot) on the top of their Zoom screens.
2. Asking the host for recording permission: Copilot asks the meeting host for permission to record the meeting for calls where it has not gotten permission to record calls. This includes all calls that the customer does not host and may also include other calls as well if the customer hasn’t synced Zoom with Copilot.
3. Integration with Zoom: Admins must sync Zoom with Copilot. Admins will have to have local recording enabled to sync Zoom (see Admin setup instructions below). Local recording means recording to your computer instead of to the cloud. In Zoom in might say "Record to your computer."
If an Admin syncs Zoom and gives Copilot permission to record, Copilot will not need to ask the host to give recording permission for individual meetings.
Set-Up Instructions For Admins
Admins need to sync Zoom with these steps:
-
Navigate to the Admin Integrations in Workspace settings in Copilot. Link: Clari Copilot
-
Hit Connect on the Zoom integration card.
-
Enter your credentials.
- If local recording is not turned on, they need to contact their IT Admins and change the Zoom Org level settings for local recording and turn it on.

5. If local recording is turned on, confirm that this setting is locked so users can’t manually turn it off. This is optional but ensures high recording success rates.

Note: This is a one-time process and is needed to avoid asking the host for recording permission on all calls.
How it works in Copilot
Note: Individual users don't need to set anything up.
1. You'll see a bot joining your Zoom calls.
2. All participants in the meeting will hear that familiar Zoom recording announcement, “This call is being recorded.”
3. In the case of calls you did not organize, the host will see a popup in Zoom asking them to permit Copilot to record the call. Copilot will record the call only if the host allows it to.
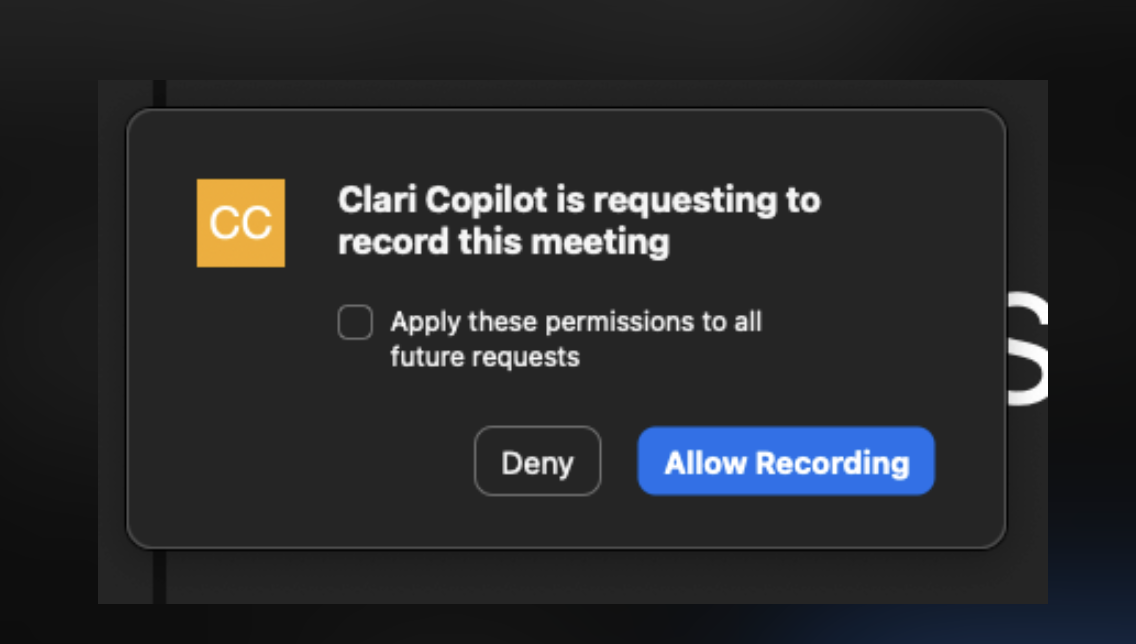
4. If you don't have Zoom synced, the host will see a popup in Zoom asking them to permit Copilot to record the call for all meetings. Copilot will record the call only if the host allows it.

FAQs
The bot joined the call, I saw it but my call isn’t recorded. The error in the Call Review screen says “This meeting was not recorded as recording permission was not granted by the host.” What’s happening?
Copilot joins all calls that are scheduled for recording by default. Once we join the call, we trigger local recording for the meeting. If local recording is turned off, Copilot will not be able to turn on local recording or request the host for permission. This causes the bot to linger on in the call without recording it. Since it hasn’t started recording, the call will be in the error state and we will automatically drop off the call after 10 mins of silence.
Do I need to enable local recording at both the org level and user level?
Yes, Zoom allows call recording based on the local recording permissions for that meeting. To ensure seamless recordings, you can either:
A. Turn on local recording at the org level and lock it (recommended).
B. Or, ask all recording users to turn on local recording.
Can I enable local recording as an admin for all my users?
Yes, you can. Admin can enable local recording at the account level and lock it. When an admin locks the local recording setting to "on" at the account level in Zoom, it enforces this setting for all users within the organization, overriding any previous user-level settings. This means that even if individual users had local recording turned off before the admin applied the lock, their ability to record locally will be enabled as per the new locked setting.
Follow these steps:
-
Access Zoom's Web Portal: Log in as an admin to your Zoom web portal.
-
Navigate to Account Settings: Under the 'Admin' section, go to 'Account Management' > 'Account Settings'.
-
Enable Local Recording: Look for the 'Recording' tab, and you'll find an option to enable local recording. Turn this on to allow users to record meetings locally to their devices.
-
Lock Local Recording Setting: To ensure that this setting cannot be changed by individual users, you might need to click on the lock icon next to the setting. This action will make the setting mandatory across your organization, preventing users from altering it.
-
Verify Changes: It's a good idea to communicate this change to your users and perhaps provide instructions on how to access and manage their local recordings.

